OneStream Non-Admin User: Secure Setup Guide
A OneStream non-admin user should receive only the access required to complete assigned work.
This guide explains account creation, group membership, security-role assignment, and application-access testing while preserving least privilege.
Assuming you are logged in as a user with rights to set up new users and groups, I am logged in as an Administrator in the following examples.
- 1. Navigate to the System Tab, then select Security under the Administration Section.
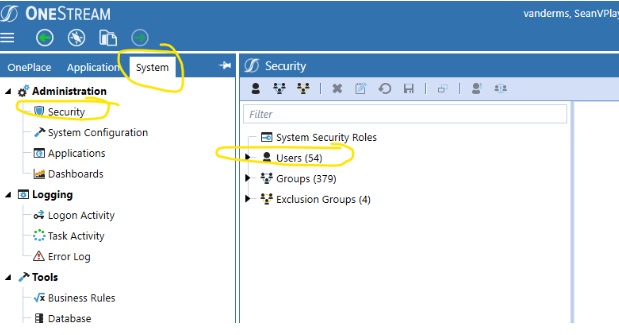
- 2. From there, select the New User from the top left of the dashboard. This will populate a dashboard on the right with properties that can be set for the new user.
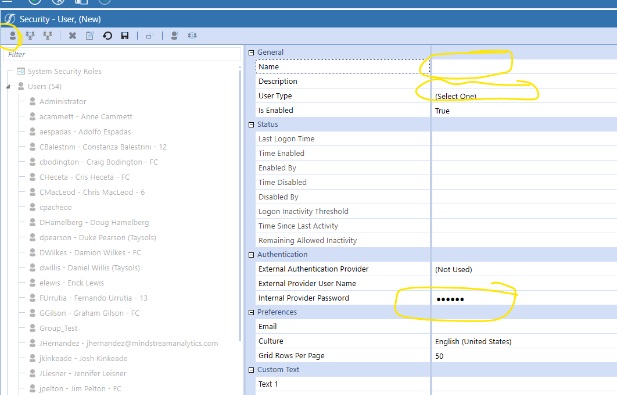
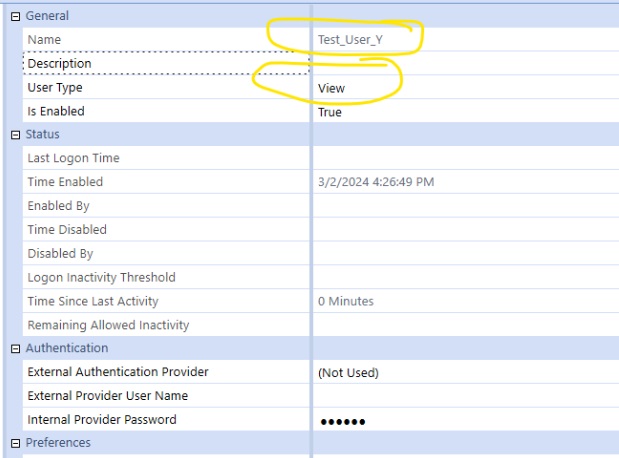
At this point you have created a new user. Now they need to be assigned to a group that has access to the application.
- 4. To create a group if you don’t already have one, from the same security dashboard that you created a user on, click on the create group button and give the group a name.
- 5. Now assign your user to the Group by clicking on the button that looks like a person in the middle of the dashboard then navigate, in the pop up dashboard, to your user that you just create. Select the user and then click on the arrow to move them to the right panel in the popup dashboard. 
- 6. Next, you must assign this newly created group to a security role with access to the application. From the Application Tab, under tools, select “Security Roles” 
- Then, select the ellipses to the right of the “openapplication” security role. From the Popup navigate to your Security Group, select it, then click “OK”
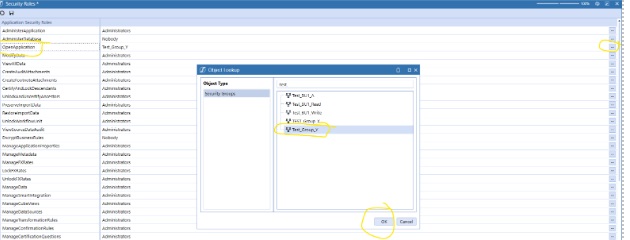
Now your security group will be assigned to the security role of “OpenApplication”
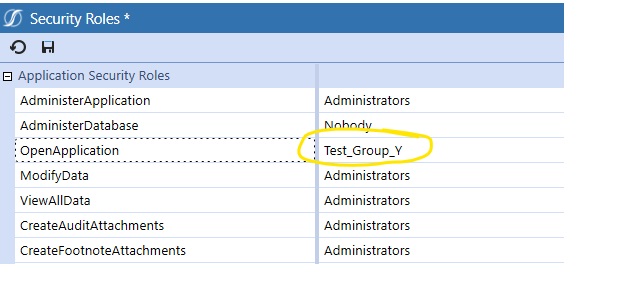
- 8. Remember to click on the “Save” button after assigning the Security Role.
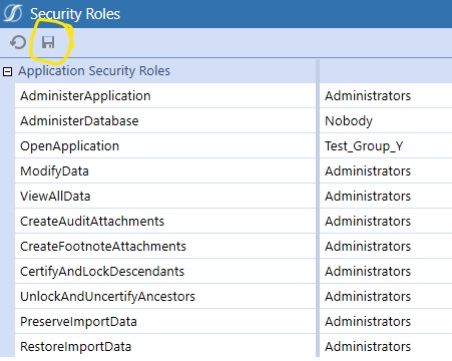
Now when this user connects and logins to OneStream they will see the application in their list.
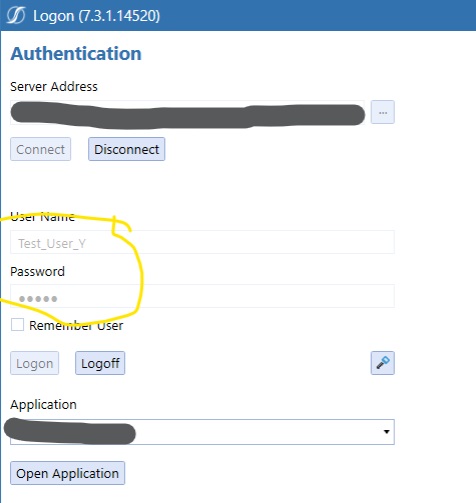
With access to the OnePlace Tab.
Apply Least Privilege to a OneStream Non-Admin User
Define the user’s business responsibilities before assigning access. Create role-based groups for common job functions instead of granting permissions directly to individuals whenever possible.
Separate application access from elevated administration rights. Confirm that the assigned groups provide the required workflow, dashboard, reporting, and data access without exposing system configuration or unrelated applications.
Use a consistent naming convention and document the request owner, approver, effective date, and expected review date. This makes access easier to audit and remove when responsibilities change.
Coordinate with data owners before granting access to sensitive scenarios, entities, reports, or workflow profiles. If temporary access is required, record an expiration date and assign responsibility for removal.
Communicate the approved scope to the user and explain how to request additional access. This prevents informal privilege growth and keeps the OneStream non-admin user aligned with documented business needs.
Validate OneStream User Access
Sign in with a test account that has the same groups as the new OneStream non-admin user. Verify that required applications, workflows, dashboards, reports, and data are available and that restricted areas remain unavailable.
Save the security changes, record the test results, and schedule periodic access reviews. Revoke unused groups promptly when a user changes roles or leaves the organization.
More OneStream Security Resources
Continue with linked Cube Views on dashboards, streamlined OneStream dashboards, dynamic dashboard buttons, Table Views with write-back, and linked Cube View guidance. Consult the official OneStream documentation for current product instructions.