Entregue fácilmente paquetes de informes a sus usuarios, parte 1

OneStream books are an excellent way to deliver reporting packages to your users. You can create a book to deliver reports directly into Excel or via PDF. You can create a book containing one entity with several different reports or a book containing one report which repeats using several different entities. Bottom line, there is a lot of flexibility with books to meet your users’ requirements!

In this blog we will discuss the basics of creating a book, including organizing books into Folders, and demonstrate how to create a book with one entity for several different reports. My next blog will show how to create a book with one report repeating for several different entities.

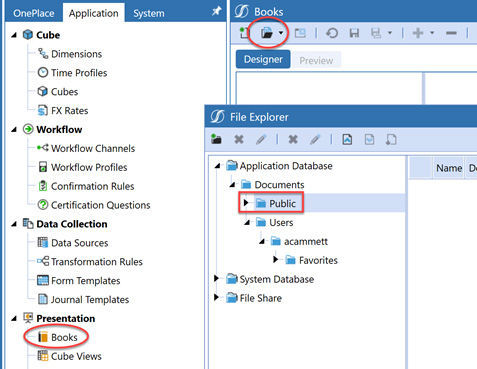
To create a book, select Application > Books:

Easily deliver reporting packages to your Users part 1 image 1
Next, select Open Book and determine in which folder your new book best belongs; you should choose Public if you want others to be able to run the book; if it is for your own use, you can store it under your private or “Users” folder:
Easily deliver reporting packages to your Users part 1 image 2
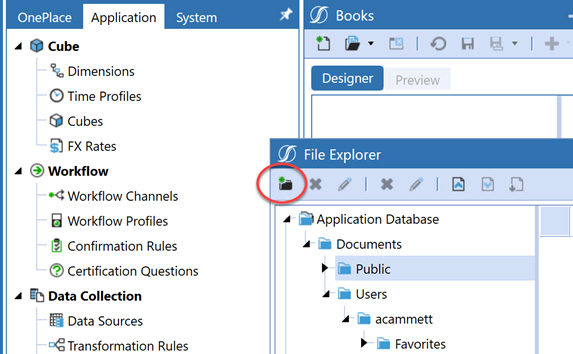
In our example, there is no appropriate folder in which we wish to store our new book so we will create a new folder. To create a new folder, click on the new folder icon:
Easily deliver reporting packages to your Users part 1 image 3
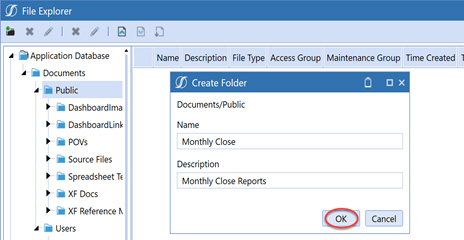
In the pop-up window, create the folder name, add a description and click OK:
Easily deliver reporting packages to your Users part 1 image 4
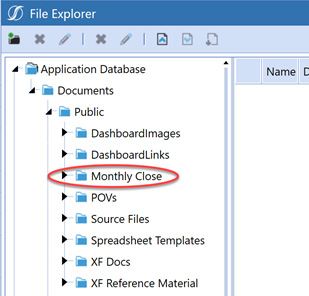
Your new folder will immediately display in the list of Public folders (you can do the same if you create a folder under your personal folder):
Easily deliver reporting packages to your Users part 1 image 5
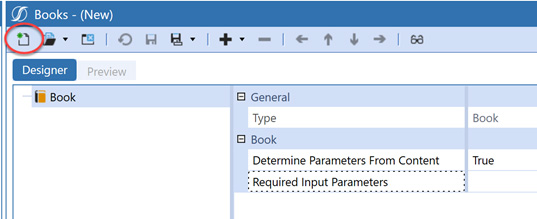
Next, click the New Book icon to start creating your book:
Easily deliver reporting packages to your Users part 1 image 6
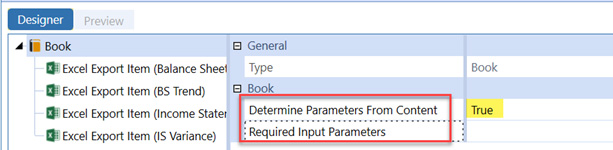
It may look like you need to add a Required Input Parameter(s); however, this is often left blank, and the Determine Parameters From Content is set to True. This means that the parameters will come from the cube views used in the book rather than defining them in this section. For very large books you may experience improved performance by using this option. We will not use it in our example, but remember to list all your required parameter names here if you choose to use it.
Easily deliver reporting packages to your Users part 1 image 7
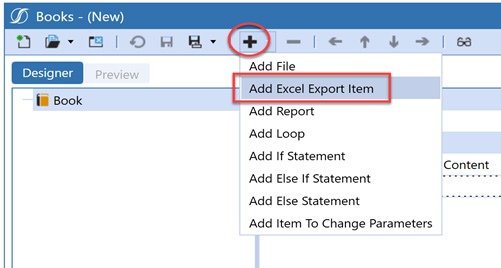
There are several Items you can add to your book. To begin this process, click the Add Items icon. In this example, I am adding a cube view to export to Excel – to do this, select Add Excel Export Item:
Easily deliver reporting packages to your Users part 1 image 8
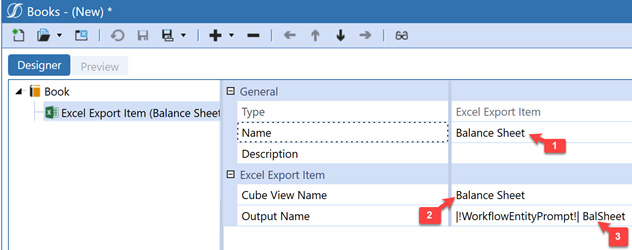
    After adding an Item, there are three sections we need to define:
  • 1. Name – this is not the exact name of the cube view; it is the name of the extracted report; this can be any name you wish
  • 2. Cube View Report – this is the full name of the Cube View report; a dropdown is available to assist you in locating the exact name of the cube view
  • 3. Output Name – this is the tab name. A parameter used in the cube view can be passed to the tab name as seen below:
Easily deliver reporting packages to your Users part 1 image 9
    After adding an Item, there are three sections we need to define:
  • 1. Name – this is not the exact name of the cube view; it is the name of the extracted report; this can be any name you wish
  • 2. Cube View Report – this is the full name of the Cube View report; a dropdown is available to assist you in locating the exact name of the cube view
  • 3. Output Name – this is the tab name. A parameter used in the cube view can be passed to the tab name as seen below:
Easily deliver reporting packages to your Users part 1 image 10

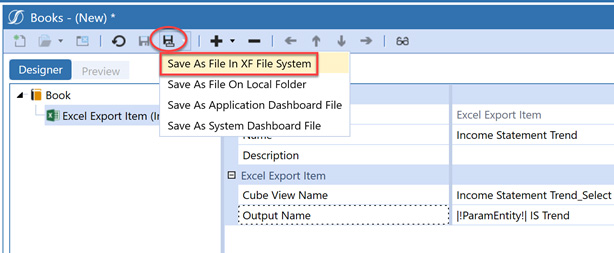
When considering what to name your book, you should make it as descriptive as possible. The book name will automatically include the extension .xfDoc.xxxBook where xxx contains the type of output you wish to export. In this case, we are saving our book so the output will be in Excel (the first choice below):

  • 1. Excel Book – use the extension: xlBook Example: Monthly Close – Entity.xfDoc.xlBook
  • 2. PDFBook – use the extension: pdfBook Example: Monthly Close – Entity.xfDoc.pdfBook
  • 3. Zip File Book – use the extension: zipBook (this output will be reviewed in the next blog) Example: Monthly Close – Entity.xfDoc.zipBook

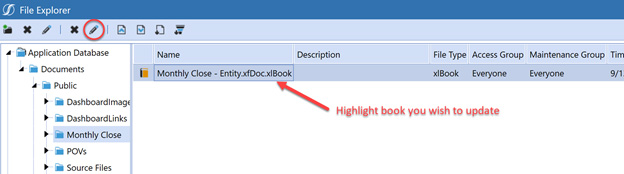
After the book is saved, you may want to provide a description for your users and set the security group(s): To add a description to your book, select the book you wish to update, followed by the Edit icon:

Easily deliver reporting packages to your Users part 1 image 11

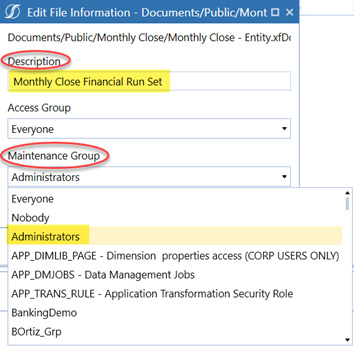
You may wish to make the book accessible to all users; however, you may wish to restrict who can edit (update) the book. The Access Group and Maintenance Group are two different options:

Easily deliver reporting packages to your Users part 1 image 12

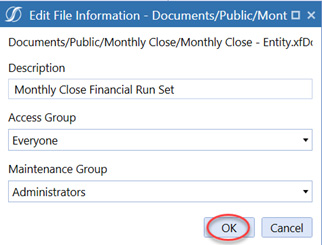
When you finish editing the book information, click OK. This will save updates made:

Easily deliver reporting packages to your Users part 1 image 13

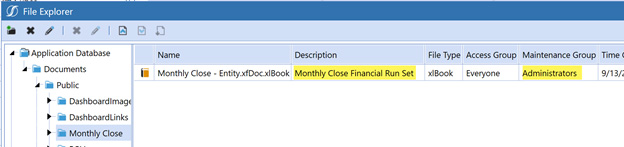
You will see the updated Description and Maintenance Group:

Easily deliver reporting packages to your Users part 1 image 14

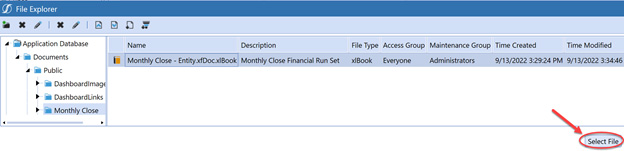
Before adding additional reports to our book, let’s test it to ensure it works as expected. To execute the book, locate it in your Public folder, click on it once to highlight it, and click on Select File:

Easily deliver reporting packages to your Users part 1 image 15

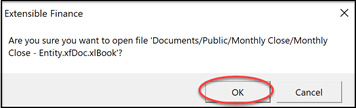
You will be asked to confirm your selection:

Easily deliver reporting packages to your Users part 1 image 16

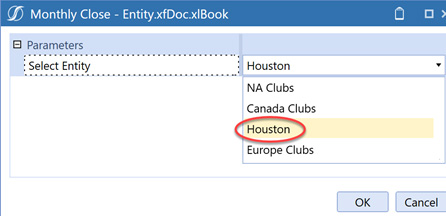
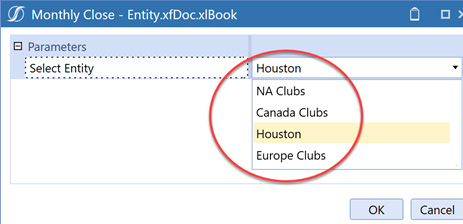
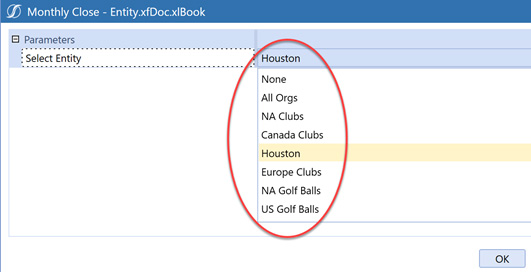
After you click OK, all parameters used in the cube views will appear in the pop-up window. In our example, we have one parameter (Entity). In this example, we will select the entity Houston:

Easily deliver reporting packages to your Users part 1 image 17

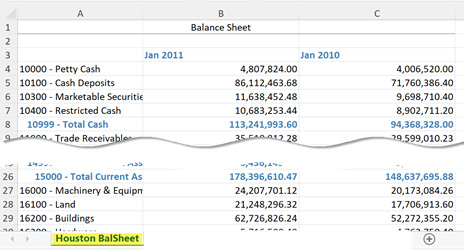
The output will export and open up in Excel:

Easily deliver reporting packages to your Users part 1 image 18

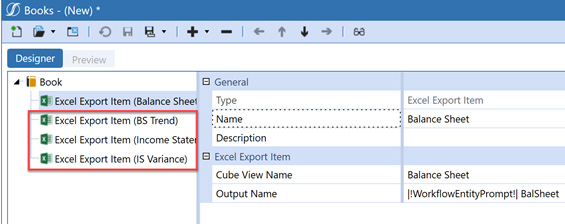
Now that we know our book is working, we will add three additional cube views to our book. By doing this, our book will produce four different reports for the same Entity:

Easily deliver reporting packages to your Users part 1 image 19

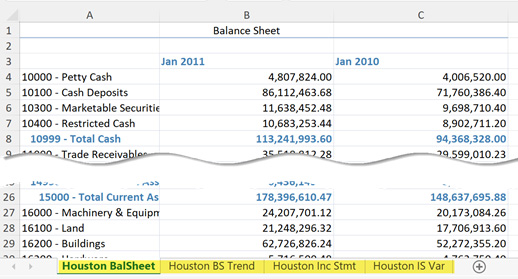
When we save and run the book again, you will see the four reports as four separate tabs in the same file:

Easily deliver reporting packages to your Users part 1 image 20

This concludes our first Book blog; be on the lookout for the next blog, which will demonstrate how to create a book that produces the same report for multiple entities!

Consejo de solución de problemas:

When you execute your book and multiple pop-up windows appear, check your cube views to ensure all cube views use the same prompts. For example, you may have several cube views in the book using your workflow entity as the prompt, but other cube view(s) are using a general entity prompt instead. In this case, you will see two entity prompts:

Easily deliver reporting packages to your Users part 1 image 21

Easily deliver reporting packages to your Users part 1 image 22

If this is your intent, there is no need to change although you may wish to update one of your parameters to clarify the parameter (for example, Select Workflow Entity). Otherwise, you will need to review your cube views to determine which cube views should be updated, so in the end, you have only one entity prompt.